The Backsplash: A Holiday Break Project a Bit Delayed
Follow my blog with Bloglovin
Over the holidays, I had ambitious plans to tackle a small project in my kitchen that has been bothering me for quite some time: the (lack of) backsplash. The area behind the sink and stove had grown speckled with splashes and stains over the past year, but when I tried to gently wipe the walls down, it became apparent that the area was nothing more than skim coat. No paint; no primer. The walls elsewhere in the kitchen are such a neutral tone that I hadn't noticed the difference. And after the attempted cleaning, I now had splotches of mint green showing through the skim coat. Lovely!


Like everything else in an old house, these sections of wall are not square, which adds an extra "fun" challenge to hanging wallpaper. The last step was squeezing on some silicone to bridge the gaps between the wonky walls and the counters. (I brought in a little help for that step since I had had enough head bumping for one project.)

Over the holidays, I had ambitious plans to tackle a small project in my kitchen that has been bothering me for quite some time: the (lack of) backsplash. The area behind the sink and stove had grown speckled with splashes and stains over the past year, but when I tried to gently wipe the walls down, it became apparent that the area was nothing more than skim coat. No paint; no primer. The walls elsewhere in the kitchen are such a neutral tone that I hadn't noticed the difference. And after the attempted cleaning, I now had splotches of mint green showing through the skim coat. Lovely!

I knew I had to get rid of the blotchy mess staring at me every time I did dishes, and I wanted to have a surface that could handle a little splash here and there, but I didn't want to install anything too permanent or expensive. Fancier finishes would need to wait for a full kitchen overhaul, and that is not in the cards for a long time. After exploring all the options available, I settled on peel and stick wallpaper. The holiday break seemed like the perfect time to put the kitchen out of commission and tackle the project. I wasn't hosting anyone, and there would be lots of leftovers to eat instead of cooking.
First up, draping, taping and lots of primer:


I had one more free weekend before returning to work, so I thought I was in good shape to finish this project on time, but...the bathroom sink had other plans.
First up, draping, taping and lots of primer:


The first coat of primer went on without a hitch, but the second coat revealed more issues with this problematic section of wall.

The roller took a chunk of skim from behind the stove, and the wall started to bubble in a few other places. Ugh! Not only did the previous owner's contractor not finish the job of primer and paint, they also did not prep properly. Next (unexpected) step: patch and sand. After all that, I very carefully finished the second coat of primer and left the wall to cure for a few days.


A leak developed at the drain, and water was slowly seeping out under the pedestal onto the floor. Fixing the sink needed two sets of hands, so plumbing took precedence. The backspash would have to wait.

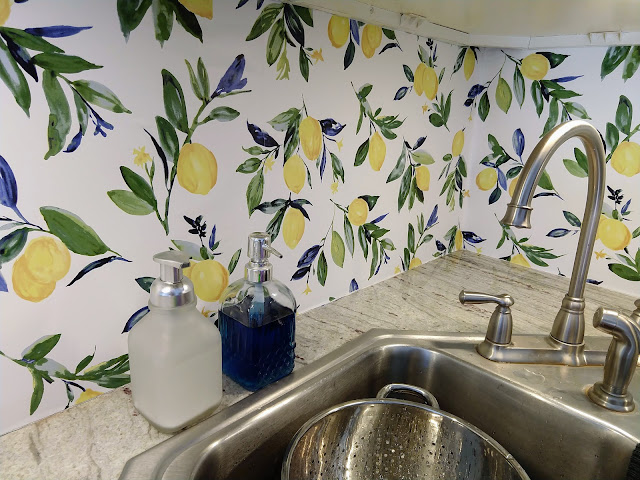
Fast forward three weeks or so, and the backsplash project is finally complete. The pattern is Lemon Drop by NuWallpaper. My kitchen is mostly white with accents of blue, so this yellow, green, and blue pattern on a white background works well with the existing elements. The pop of color brightens up an otherwise dim space. More importantly, little splashes will wipe right off the vinyl.

I won't go into detail about the tedious process of applying the paper, but I will say there was a lot of cursing, contorting into awkward positions, and bumping my head while trying to line up the pattern and correctly place each strip of paper in an 18" high space.

Like everything else in an old house, these sections of wall are not square, which adds an extra "fun" challenge to hanging wallpaper. The last step was squeezing on some silicone to bridge the gaps between the wonky walls and the counters. (I brought in a little help for that step since I had had enough head bumping for one project.)

I'm happy to report I now stare at cheery lemons while I do the dishes - a big improvement over the murky, mint splotches.


Comments
Post a Comment